
Key Takeaways
Bespoke stone furniture is developed through a sequence of decisions, from intended use and slab selection to fabrication, inspection and installation.
- Start with how the piece will be used, not only how it should look.
- Confirm stone, dimensions, edges, finishes and support details in the drawing.
- Expect natural variation in colour, veining, porosity and mineral markings.
- Allow for weight, access, packing and installation from the beginning.
- Treat cleaning and long-term care as part of the specification.
Defining the brief for a bespoke stone furniture project
A successful custom stone fabrication project begins with a useful brief rather than a finished-looking image. The brief should describe the room, the people using it and the practical demands placed on the piece. It should also record what is known about the site, budget and programme. That early clarity gives the designer and fabricator something reliable to test.

Translating the intended use into practical requirements
A dining table, console, basin or sculptural side table may all be made from stone, but they do not face the same demands. Record whether the piece will be used every day, exposed to food and drink, located in a bathroom, or placed in a hospitality setting with heavier traffic. Consider heat, staining, impact, water and cleaning routines before appearance begins to dominate the conversation.
The brief should also identify required openings, such as cable routes, tap holes, drainage or fixings. These details are easier to resolve on paper than after a slab has been cut. A clear use case becomes a practical reference throughout production.
Choosing the right stone for appearance and performance
Natural marble, travertine and onyx each bring different patterns, textures and levels of porosity. Engineered and sintered materials may offer a more controlled visual character, but the right choice still depends on the intended use, edge detail, finish and support system. A useful comparison is not simply light stone versus dark stone; it is how the material will behave in the room over time.
For a Singapore project, the guidance on bespoke stone furniture offers a useful starting point for considering material, scale and installation together. Samples can help with colour and surface feel, although a small sample cannot show the full movement of a selected slab.
Balancing dimensions, proportions and ergonomics
A stone piece can be visually quiet and still feel wrong if its dimensions are not resolved. Dining height, knee clearance, basin depth, sofa relationship and circulation space should be checked alongside the overall length and width. The thickness of the top and the visual weight of the base also affect how comfortably the piece sits in a room.
For a dining table, chair positions and walking routes deserve as much attention as the tabletop. A modest change in diameter or overhang can make a noticeable difference to everyday use. This is where measured plans and room photographs are more useful than a general reference image.
Establishing the budget, timescale and project responsibilities
A quotation should distinguish the furniture itself from stone selection, fabrication, packing, delivery and any installation requirements. Weight and destination can materially affect the logistics, particularly for a large top or a piece with several fragile components. Responsibilities for site measurement, access checks, plumbing, structural support and final fixing should be agreed before production begins.
The made-to-order stone furniture guide is useful when shaping those early questions around dimensions, edges, finishes and site conditions. It is sensible to include time for drawing approval, material confirmation and possible revisions rather than treating fabrication as an instant final stage.
Developing the design from concept to fabrication drawing
The drawing is the point where an attractive idea becomes a buildable object. It records the geometry, material, thicknesses, joins, supports, openings and finish in a form that different people can review. A strong drawing also exposes uncertainty early, when changes are still relatively straightforward. This stage is less about decoration than making decisions visible.

Turning sketches and references into a workable design
Sketches are useful for proportion, atmosphere and intent, but they rarely contain enough information for fabrication. They need to be developed into plans, elevations, sections and details that show how the stone meets the supporting structure. Reference images can guide the character of a piece without being treated as a promise of identical veining or construction.
In a factory-to-order process, each piece is produced from its approved drawing rather than selected as interchangeable warehouse stock. That makes the drawing a shared record of what is actually being commissioned.
Resolving joins, edges, curves and supporting structures
A seam should be placed where it is structurally sensible and visually quiet, not simply where it is easiest to draw. Edge profiles need to account for thickness, handling and the risk of exposed corners. Curves require enough material to be shaped safely, while bases must provide continuous and stable support without overwhelming the stone.
Combining stone with timber, metal or glass introduces movement, tolerances and different fixing methods. Those interfaces should be detailed rather than left to be solved on site. Small details affect longevity when a heavy, rigid material is joined to another component.
Checking clearances, weight and structural requirements
Stone is dense, and its weight affects the base, floor, lifting method and delivery route. Check door widths, lifts, stair turns and temporary storage as well as the final room dimensions. Cantilevers, narrow sections and cut-outs may need additional support even when the finished form looks simple.
A review should also cover clearances for chairs, doors, taps, drawers, plumbing and cleaning access. These checks prevent a visually successful object from becoming awkward or unsafe in use.
Approving drawings, samples and material selections
Approval should identify the exact drawing revision, selected material, finish, edge treatment and any agreed variation. If a slab is selected in person or through detailed photographs, its visible areas and intended orientation can be marked before cutting. The approval record should make clear what remains naturally variable.
A short video explaining stone furniture fabrication can help clients understand why drawing approval and slab review sit between concept and production. Once those decisions are confirmed, later changes may affect cost, waste or programme.
The purpose of this stage is not to remove every natural irregularity. It is to ensure that the irregularities, dimensions and construction choices are understood before work starts.
Selecting and preparing the stone
Stone selection is both a visual and technical exercise. A slab has a particular direction, pattern, thickness and set of natural characteristics, so the finished piece begins with choosing material that can support the intended design. The selection should be assessed against the drawing, not in isolation. This is especially important when several surfaces need to read as one composition.
Comparing natural stone, engineered stone and sintered materials
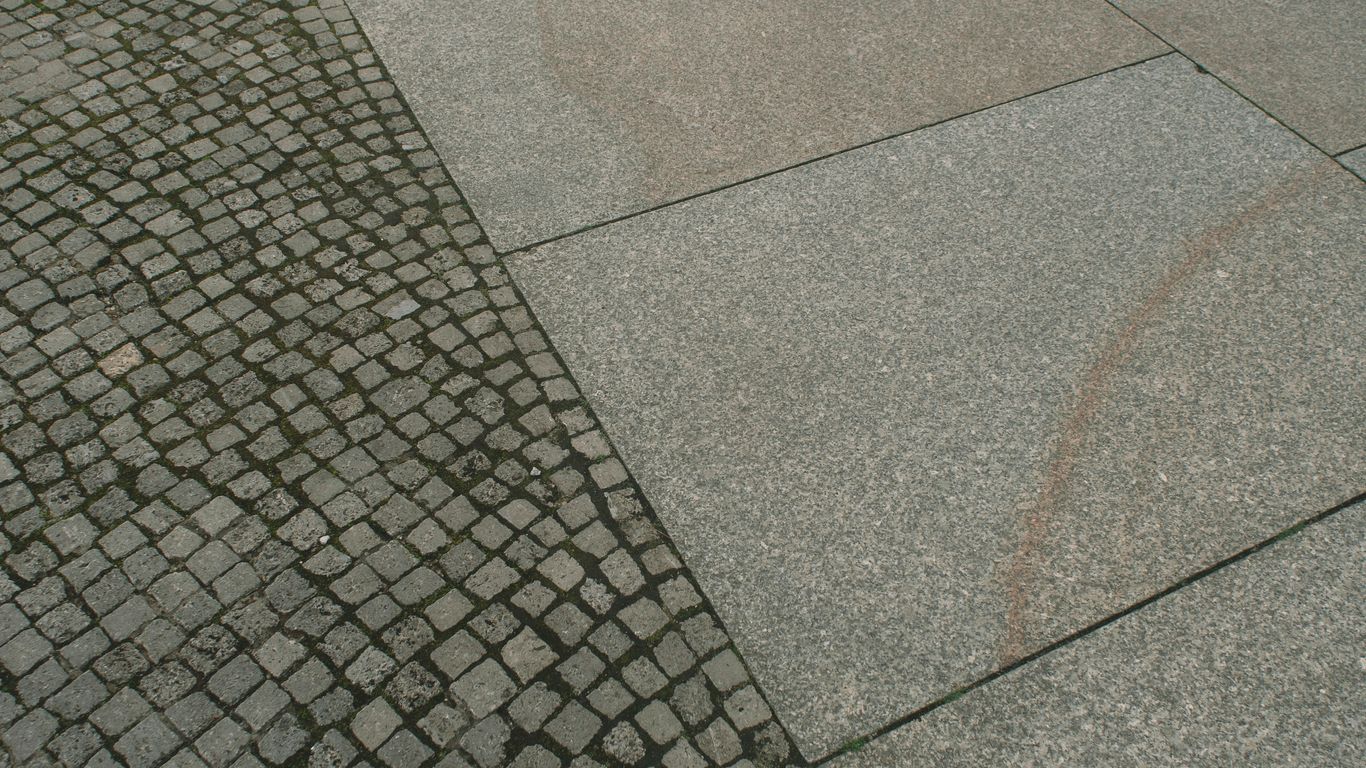
Natural stone offers variation that cannot be repeated exactly, from quiet tonal shifts to strong veining and mineral movement. Engineered stone and sintered materials can provide different levels of consistency and performance, but their suitability still depends on the design and application. There is no universally superior material; there is only a better or worse fit for a particular brief.
For a more focused comparison, the guide to marble and sintered stone considers visual variation, maintenance and everyday dining use. The final decision should also account for edge feasibility, surface finish, availability and repair expectations.
Inspecting slabs for colour, veining and natural variation
Inspect the whole slab where possible, rather than relying only on a small sample. Look at the direction of the veins, clusters of colour, open pores, mineral marks and areas that may become prominent after polishing or honing. A design may deliberately centre a feature, avoid it or divide it across several components.
Variation is part of natural stone, not a manufacturing error. The important question is whether the selected slab is appropriate for the approved composition and whether its notable characteristics have been discussed clearly.
Planning the cutting layout to maximise the slab
The cutting layout positions each component on the slab before fabrication. It should respect the grain or vein direction, keep visible faces in the intended orientation and allow for saw kerfs, edge shaping and possible defects. Efficient nesting can reduce waste, but the most economical layout is not always the best visual layout.
A typical layout review considers several connected decisions:
- Which surfaces will be most visible in the finished room?
- Where should the principal vein or tonal movement appear?
- Which smaller components can use less prominent areas of the slab?
- What allowance is needed for shaping, seams and natural defects?
After this review, the cutting plan can be judged for both material efficiency and visual intent. That balance is central to bespoke work.
Identifying risks such as fissures, porosity and tonal changes
Fissures, filled areas, porosity and changes in tone may influence where a component can be placed or how it should be finished. They can also affect handling and the amount of support needed during cutting. A risk review does not make natural stone uniform; it helps the team decide how to work with what is present.
The Carrara marble tabletop guidance illustrates why inspection, preparation and dry-fitting matter when natural stone is installed. Similar discipline is useful for furniture, even when the construction method differs.
Cutting and shaping the components
Once the material and layout are approved, the slab becomes a set of carefully defined components. Cutting establishes the primary dimensions, while shaping creates the openings, curves and edge details that give the design its identity. Accuracy matters, but so does the order in which operations are carried out. Delicate work must be protected from unnecessary handling.

Using digital templates and precision cutting equipment
Digital templates translate the approved geometry into machine-ready information while preserving key dimensions and reference points. Precision cutting equipment can establish straight edges, angles, openings and repeatable components, but the result still depends on correct drawings, suitable support and careful checking.
Templates should be reviewed for orientation and scale before material is cut. A small error at this point can be repeated across several pieces, so verification is part of fabrication rather than an optional extra.
Creating openings, curves, profiles and detailed edges
Openings for sinks, taps, cables, fixings and services require sufficient clearance and edge strength. Curves and internal corners need particular care because stress can gather around tight radii. Edge profiles may be simple, softened, bevelled or more sculptural, but each profile changes the apparent thickness and handling risk.
The selected finish also influences how an edge is read. A polished profile reflects light differently from a honed or textured one, so edge samples are useful when the detail is central to the design.
Managing delicate sections and complex three-dimensional forms
Thin rails, narrow returns, deep recesses and carved transitions are vulnerable during cutting, lifting and finishing. Temporary supports, staged handling and a clear sequence can reduce the chance of damage. Complex forms may also need to be divided into sections that are joined later.
The practical solution is not always to simplify the visible design. It may be to simplify the hidden construction, provide a better support, or adjust a tolerance while preserving the intended silhouette.
Matching veining and positioning visible surfaces
Where two components meet, the vein direction and tonal relationship should be considered before adhesive is applied. Book-matching, flowing alignment or deliberate contrast may each be appropriate, depending on the drawing. Exact continuity cannot be guaranteed in a naturally variable slab, but thoughtful positioning can make the composition feel intentional.
The same principle applies to bases and secondary pieces. Components that are not directly adjacent can still compete visually if their tones or patterns are placed without a plan.
Refining the surface and assembling the piece
Fabrication does not end when the outline has been cut. The surface finish changes the way stone reflects light, feels to the hand and responds to everyday use. Assembly then brings separate components together while allowing for discreet seams and compatible materials. The final character emerges through both machine work and hand judgement.
Choosing a finish for the design and intended use
Polished surfaces bring depth and reflection, while honed surfaces create a softer, less reflective appearance. Textured finishes can add grip and visual weight, but they may require different cleaning habits. The choice should relate to lighting, touch, exposure to spills and the degree of visual variation the design is meant to show.
The comparison of honed and polished marble is helpful when deciding how reflection, texture and minor wear will affect furniture in use. A finish is not merely a colour adjustment; it is part of the performance and maintenance brief.
Honing, polishing, texturing and hand-finishing the stone
Surface refinement is carried out progressively, with checks for flatness, consistency and the intended level of sheen. Edges and curves often need hand-finishing so that they meet the main surface without an abrupt change in texture. A sample or retained reference can help the team compare the work against the approved finish.
Lighting should be considered during inspection because raking light can reveal marks or changes that are less visible in the workshop. This does not mean every natural mark should be removed; it means the finished surface should be understood on its own terms.
Joining sections with discreet seams and suitable adhesives
Sections are dry-fitted before final joining so that alignment, contact and seam visibility can be checked. Adhesives should suit the stone, joint and environment, and the joint should not be asked to compensate for poor support or inaccurate cutting. Excess adhesive is removed carefully so that the seam remains neat without damaging the adjacent finish.
Where a seam is unavoidable, its position can follow a change in plane, a design break or a less prominent viewing angle. Good assembly makes the joint feel considered rather than hidden at any cost.
Integrating timber, metal, glass and other supporting materials
Mixed-material furniture needs a clear hierarchy of movement and support. Timber may expand or contract, metal may require threaded or concealed fixings, and glass needs appropriate bearing and protection. Stone should not be forced to absorb movement that belongs to another material.
Details such as pads, gaskets, brackets and packers may be largely unseen, yet they determine how the piece sits and ages. A well-resolved interface keeps the visible design calm while allowing each material to perform properly.
Quality control and preparation for delivery
Inspection is a physical review of the completed piece against the approved information. It brings together dimensions, finish, alignment, stability and packing requirements before the furniture leaves the workshop. This is also the point to confirm what can be checked in the factory and what must be completed on site. A calm handover reduces uncertainty for the receiving team.
Checking dimensions, alignment and surface consistency
Measure the finished components against the drawing, including overall size, thickness, openings and fixing positions. Check that seams, edges and curves align as intended and that visible surfaces have a consistent finish. Natural variation should be compared with the selected material and agreed orientation, not judged against an unrealistic idea of uniformity.
Photographs, marked-up inspection notes and a record of the final revision can help everyone understand the condition of the piece before packing. This is particularly useful when delivery is international or installation is handled by another team.
Testing stability, load-bearing points and moving parts
A table should sit without rocking, a cabinet door should move freely and a basin or console should transfer its load into the intended support. Check feet, brackets, concealed frames, drawers and removable elements individually. Where the piece relies on site fixing, the factory review should still confirm that the connection points are correctly located.
The test should reflect the way the furniture will be used without treating a visual inspection as a substitute for a properly designed structure. Any unresolved movement or stress should be addressed before dispatch.
Protecting finished surfaces during handling and transport
Packing must account for weight, corners, polished faces, seams and the order in which the piece will be lifted. Clean protective layers should separate finished surfaces from restraints and other components. Crates, frames and labels should support safe handling without putting concentrated pressure on fragile edges.
The packing method should be discussed alongside delivery conditions, especially where the route includes transfers, stairs or long periods in temporary storage. Protection is part of fabrication because damage after completion can undo careful surface work.
Coordinating access, delivery routes and installation conditions
Confirm the destination, unloading point, lift dimensions, stair access, available labour and final position before dispatch. For a large piece, a route that works on a plan may still fail because of a tight turn or an unsuitable floor. The installation area should be clear, dry and ready to receive the furniture.
A quotation may include production, packing and delivery as separate elements, with destination-specific estimates and installation requirements confirmed for the individual project. That distinction keeps logistics transparent rather than assuming every site has the same conditions.
Installing and caring for bespoke stone furniture
Installation is the final practical stage, but it should not be treated as an afterthought. The piece must be positioned accurately, supported correctly and protected while surrounding work continues. Once installed, the care routine should reflect the stone and finish selected for the project. Sensible maintenance preserves character without trying to make natural material behave like plastic.
Positioning and securing the finished piece on site
Use the agreed lifting and positioning method, checking the base, level and clearances before final fixing. Confirm that joins, service openings and adjacent materials align with the room. Heavy components should be moved with suitable equipment and enough people rather than dragged across the floor or twisted into place.
If the design includes separate sections, assemble them in the planned order and inspect seams before removing protection. Final adjustments should be recorded so that future maintenance teams understand the construction.
Protecting floors, walls and surrounding finishes during installation
Use clean blankets, edge protection and floor coverings appropriate to the site. Keep tools, grit and packaging away from finished surfaces, and avoid leaning stone against unprotected walls. Other trades should know when the furniture is ready for use and which surfaces remain vulnerable.
For pieces installed in active renovations, a temporary protective cover may be needed after fitting. Protection should allow ventilation and should not trap moisture against porous stone.
Cleaning products and everyday maintenance to avoid damage
Remove spills promptly with a soft cloth and a cleaner suitable for the material and finish. Avoid abrasive pads, harsh acids and untested products, particularly on marble and other calcareous stones. Trivets, coasters and mats can reduce exposure to heat, staining and grit without changing the way the furniture is used.
The broader advice on natural stone care is useful for thinking about sealing, spills and everyday maintenance across different stone types. Always follow the care guidance supplied for the actual stone and finish rather than applying one routine to every surface.
Repair, resealing and long-term care considerations
Some stones and finishes may benefit from resealing, while others may require only regular cleaning and periodic inspection. Resealing does not make a surface immune to etching, impact or staining, and it should be assessed according to the material and exposure. Small chips, scratches or seam issues should be reviewed early so that a suitable repair can be planned.
Keep the approved drawing, material information and care instructions with the project records. If replacement or repair is ever needed, those details provide a more reliable starting point than a photograph alone.
Begin Your Stone Project
If you are planning a made-to-order stone table, basin or architectural piece, share the intended use, dimensions, material ideas and site conditions with Geoscenic Stone. You can request a quotation for a project-specific discussion covering the drawing, stone, fabrication, packing and delivery requirements.
Conclusion
Custom stone fabrication is a chain of connected decisions: a clear brief informs the drawing, the drawing guides the slab layout, and careful fabrication carries the approved idea through finishing, inspection, delivery and installation. When natural variation, weight, access and maintenance are considered early, bespoke stone furniture can feel both distinctive and practical for the room it occupies.
Frequently Asked Questions
What is custom stone fabrication?
Custom stone fabrication is the process of developing stone components to a specific design, then cutting, shaping, finishing, assembling and preparing them for delivery or installation.
How early should stone be selected?
Stone should be considered during the design stage, before dimensions and visible surfaces are fully fixed. Early selection helps the team assess slab size, veining, thickness, defects and availability.
Can a sketch be used as a fabrication drawing?
A sketch is a useful starting point, but fabrication normally requires drawings that show dimensions, sections, openings, joins, supports, edges and finishes clearly enough to review and build.
Is natural stone always uniform in colour and pattern?
No. Natural stone can vary in tone, veining, figuring, porosity and mineral markings. The selected slab and its intended layout should be reviewed with those characteristics in mind.
How is the weight of a stone furniture piece managed?
Weight is considered through thickness, support, lifting methods, access routes, floor conditions, packing and installation planning. Large or cantilevered pieces may require additional structural review.
What finish is best for stone furniture?
The best finish depends on the stone, intended use, lighting, desired appearance and maintenance routine. Polished, honed and textured finishes each change reflection, touch and care requirements.
What should be checked before delivery?
Confirm dimensions, alignment, surface finish, stability, fixing points, packing, access, unloading arrangements and the condition of the installation area before the piece leaves the workshop.