
Key Takeaways
A stone basin can be both a practical sanitary fitting and a substantial architectural element. Good stone basin installation starts with accurate information about weight, support, drainage and access rather than with the basin alone.
- Confirm the basin type, dimensions, fixing method and centre of gravity before ordering supports.
- Assess the wall, floor, cabinet and worktop as one connected load-bearing system.
- Coordinate tap, waste, trap and overflow details before fabrication or site installation.
- Dry-fit the basin, protect its edges and use the specified fixing and sealing materials.
- Keep valves, joints and cabinet sections accessible for inspection and future repairs.
Assess the basin and the installation area
Begin with the approved drawing, the actual site dimensions and the installation instructions supplied for the basin. Natural stone varies in density, thickness and geometry, so an assumed size or an image of a similar piece is not enough. The basin, its support and the surrounding bathroom should be considered together from the first site visit.
Identify the basin type and fixing method
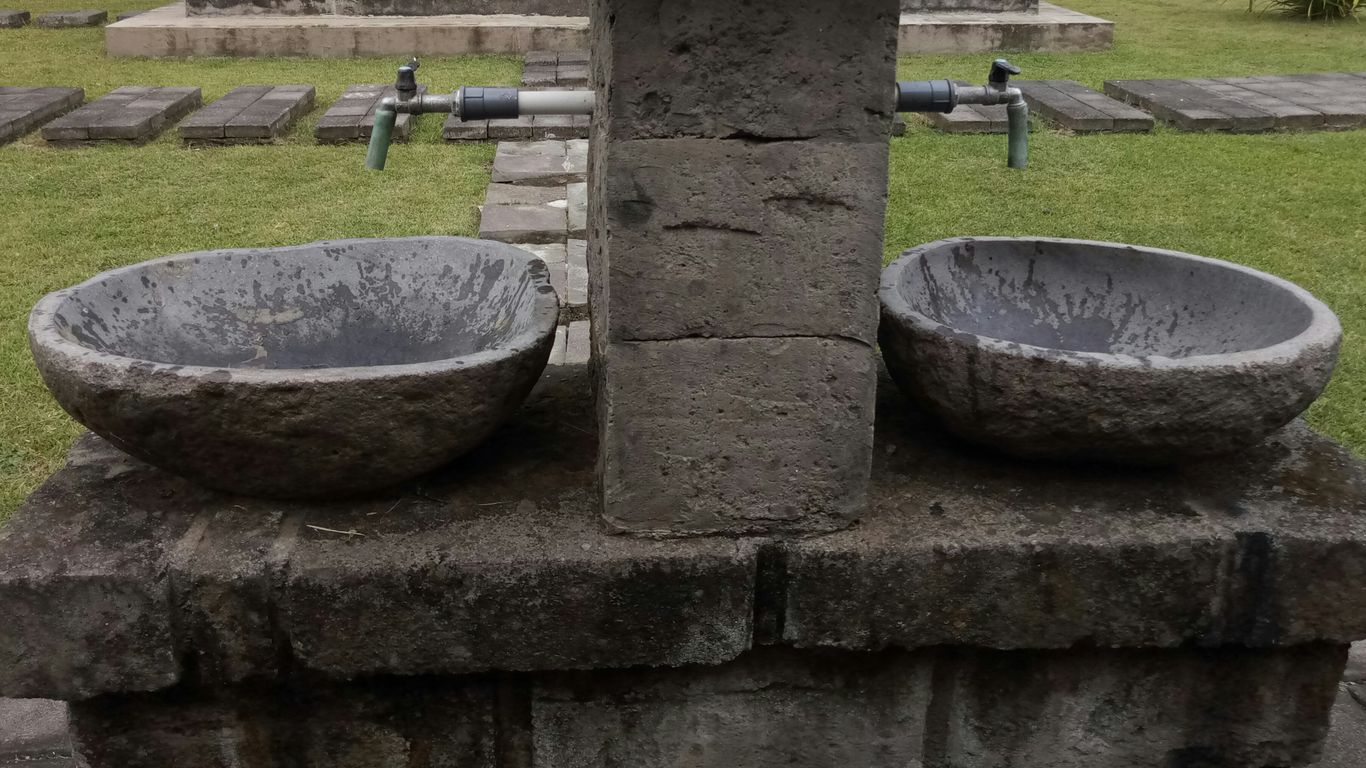
A vessel basin, inset basin, wall-mounted basin and freestanding basin place their loads on different parts of the room. Establish whether the piece sits on a worktop, rests on a pedestal, is carried by concealed brackets or forms part of a larger stone assembly. A useful reference for comparing these arrangements is this guide to natural stone wash basins, particularly where style and installation method need to be resolved together.
Read the fixing specification before drilling or fabricating anything. Some systems depend on a continuous support surface, while others require accurately positioned brackets, threaded rods or concealed steelwork. Do not substitute a fixing simply because it appears visually similar.
Check the basin’s dimensions and centre of gravity
Record the overall length, width, height, rim thickness, waste position and any tap holes. The centre of gravity may sit away from the geometric centre when the basin has a thick wall, a deep bowl or an offset tap deck. That eccentric load matters particularly on a floating vanity or narrow wall bracket.
Allow space to handle the basin safely. A piece may fit the finished room but still be impossible to turn through a doorway or lift onto its support without striking a corner. Keep the approved drawing available on site and compare it with the delivered piece before installation.
Inspect the wall, floor and surrounding structure
Open up enough information to establish what is actually carrying the load. A tiled plasterboard wall may conceal timber or metal framing, while a masonry wall may still contain services in the proposed fixing zone. Check the floor for level, local weakness and the route of the waste pipe before choosing a pedestal or floor-mounted support.
Where the basin is part of a bespoke vanity, inspect the cabinet carcass, wall restraint and worktop together. The relevant question is not simply whether one bracket looks strong; it is whether the complete load path transfers weight safely into the wall or floor.
Confirm clearances for users, doors and drawers
Mark the basin outline on the wall or temporary worktop and test the room as it will be used. Check elbow room, tap reach, splash zones and the distance to adjacent sanitaryware. Open drawers and doors fully, including handles, and make sure a person can stand comfortably at the basin without blocking the bathroom entrance.
For compact rooms, a few millimetres can change whether a drawer clears the trap or whether a door catches the basin edge. Resolve those conflicts on the drawing, not after the stone has been drilled.
Calculate weight and structural requirements
Solid stone is heavier than many people expect, and the finished installation may include a worktop, taps, waste fittings, stored items and water. The support therefore needs to be designed for the combined load and for the movement created when people lean on the rim. A specialist discussion is sensible whenever the construction is unusual, the wall is uncertain or the basin is particularly large.

Account for the basin, worktop, water and fittings
Use the fabricator’s stated weight where available and add the support structure rather than relying on a rough visual estimate. Include the worktop, brackets, cabinet, tap, waste, trap and the water held in the bowl. Also consider a reasonable incidental load at the front edge, since a bathroom fitting is not used under laboratory conditions.
The quotation and production drawing should distinguish the stone piece from packing, delivery and any installation allowance. For made-to-order work, dimensions and weight are project-specific, so confirm the final figures before the support is built.
Check whether the wall can support the load
Identify the wall construction and the location of studs, noggins, masonry or a designed steel frame. Fixings must transfer forces into suitable structure rather than into plasterboard alone. A wall-mounted basin may also impose a pulling force at its upper fixings, especially when its projection is deep.
For a reinforced partition, record where the reinforcement is located and coordinate it with pipes and electrical services. A specialist reference on loadbearing wall construction can help explain why concealed support must be resolved before finishes are closed up, although the final design still belongs to the project’s engineer or qualified installer.
Choose between wall-mounted, countertop and pedestal support
Wall-mounted support creates a clean, floating appearance but demands a reliable load path into the wall. A countertop basin spreads its load through the worktop, which then needs adequate support at the cabinet or frame. A pedestal or floor-mounted arrangement transfers load downwards, but the floor and waste route must be prepared for it.
The choice should follow the building and the basin geometry, not just the preferred appearance. A freestanding stone basin may need floor preparation and carefully coordinated waste pipework, while a shallow countertop piece may require a different approach to splash control and trap access.
Know when to involve a structural engineer or qualified installer
Bring in a structural engineer or suitably qualified installer when the wall is load-bearing, the partition is uncertain, the support is concealed, the basin is unusually heavy or the installation affects waterproofing and services. This is also the right step when the proposed support differs from the manufacturer’s or fabricator’s detail.
A written support detail is valuable for the whole team. It records the intended fixings, steelwork, bearing surfaces and tolerances, reducing the chance that a site adjustment quietly changes the design assumptions.
Plan the worktop, cabinet or support frame
The support should be designed around the basin’s actual geometry, not a generic cut-out. Confirm the top thickness, edge treatment, cabinet openings, fixing zones and service routes before fabrication. For custom stonework, production drawings are the place to coordinate these details and to show how the visible piece meets the concealed structure.
Select materials that can withstand moisture and weight
Choose a worktop and frame that remain stable in a humid bathroom and can carry the calculated load without excessive deflection. Stone, solid timber, moisture-resistant sheet materials and metal frames each behave differently at joints and fixings. Protect vulnerable edges and keep standing water away from unsealed board materials.
Material choice also affects the finished appearance. Natural marble, travertine and onyx have distinct porosity, veining and maintenance implications; a useful overview of natural stone basins in Singapore places those choices alongside humidity, ventilation and everyday use.
Reinforce the support structure where necessary
Add rails, brackets, legs, a subframe or concealed steelwork where the cabinet alone is not enough. Reinforcement should sit where it supports the basin and should leave room for the trap, waste and isolation valves. Avoid placing a brace directly across an access route merely because it is convenient to install.
For a wall-hung installation, coordinate the reinforcement with the fixing template and with the final wall finish. A bracket that is secure but out of position can still make the basin impossible to fit cleanly.
Create a stable, level surface for the basin
Set the support so it is level in both directions before applying sealant or adhesive. Check the worktop for twist, unsupported corners and local high points, then dry-fit the basin and fittings. A small error at this stage can become a visible uneven joint or cause water to sit at one side of a shallow bowl.
The surface should be clean, dry and free from dust. Do not use a thick bed of adhesive to correct a badly uneven support; correct the structure first, then use the specified bedding material in a controlled layer.
Allow for movement, tolerances and future maintenance
Stone, timber, metal and board materials can respond differently to moisture and temperature. Follow the drawing for joints, clearances and flexible sealant rather than locking every material together rigidly. Leave enough tolerance for fitting without forcing the basin into place, while keeping the finished joint neat and continuous.
Plan removal as carefully as installation. A cabinet that cannot be opened without disconnecting the entire vanity turns a routine trap inspection into a major repair. Cabinet hardware guidance is relevant here because hinges and drawer slides must suit door weight, opening and cabinet construction, even though the hardware is only one part of the access plan.
Prepare the plumbing and waste connections
Plumbing should be coordinated before the worktop is cut and before the basin is fixed permanently. Confirm the finished floor level, the basin rim height, the tap position and the route to the waste stack. The aim is a clean connection that can be tested and serviced without placing stress on the stone or fittings.
Position the hot, cold and waste pipework
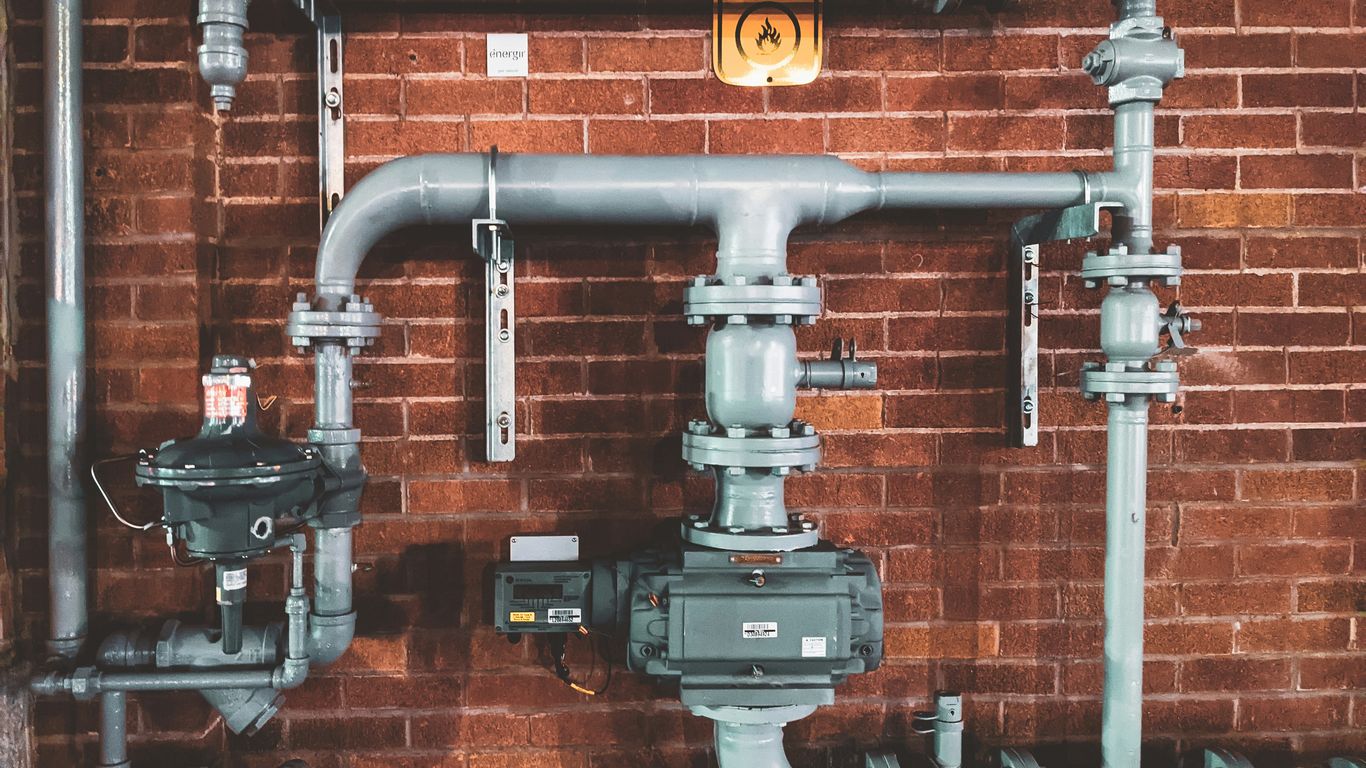
Set out hot and cold supplies to suit the tap body and the cabinet interior. Position the waste outlet so the trap can be installed without forcing it sideways or creating an unnecessary low point. Where the waste passes through a wall or floor, check the route against joists, studs, waterproofing and other services.
A drawing that shows centre lines, finished heights and pipe penetrations will save time on site. It also helps the fabricator place holes accurately and prevents a service opening from landing under a bracket or structural rail.
Match the tap, waste and trap to the basin
Check the tap type, hole diameter, deck thickness, waste size and trap configuration as one set. A vessel basin may require a tall tap or wall-mounted tap, while an integrated or shallow basin can need a lower-profile fitting. Confirm whether the waste is slotted or unslotted according to the basin’s overflow arrangement.
Do not assume that a visually compatible fitting will have enough thread, clearance or seal against the stone. Dry-assemble the components where possible and follow the fitting manufacturer’s instructions for washers, tightening and sealants.
Allow for the basin’s depth and overflow arrangement
Measure the internal bowl depth as well as the external height. Deep bowls affect tap reach and trap clearance; shallow bowls make the fall to the waste and the finished level more critical. If there is an overflow, confirm its channel, outlet and waste compatibility before the basin is sealed down.
For a custom marble piece, drainage and outlet placement should be settled in the design stage. The custom marble basin guide is a useful reminder to coordinate tap positions, splashbacks, waste outlets and sculptural or shallow forms together rather than as separate decisions.
Plan access to isolation valves and compression joints
Leave a clear route to isolation valves, trap connections and compression joints. Removable drawers, panels or a service void may be needed, especially where the basin sits on a closed cabinet. Check that tools can reach each nut without damaging the stone or adjacent finishes.
Access planning is not limited to bathrooms: even a simple airport transfer service depends on accurate details and a workable route. The same practical principle applies here—record the pipe positions, valve locations and clearances so another person can understand the installation later.
Mark out and install the stone basin
Once the support and plumbing are ready, handle the stone as a finished architectural component. Protect corners, edges and polished surfaces from tools and grit. Work from the approved drawing, but inspect the delivered basin as well, since natural variation in tone, veining and mineral marks is part of the material rather than a reason to force a changed position.
Dry-fit the basin and check the finished position
Place the basin on its support without adhesive and check the front projection, wall gaps, tap alignment and waste position. Confirm that drawers open, the door clears and the rim sits at the intended finished height. This is the last easy opportunity to correct a mismatch between the room and the drawing.
Mark the successful position with removable tape or a reference line. Remove the basin safely before cleaning the surfaces and preparing the specified fixing materials.
Mark fixing points without weakening the stone
Use the approved template and keep holes away from narrow edges, corners and areas of reduced thickness. Never drill by eye into a finished stone piece unless the fabrication detail specifically allows it. Diamond tooling, water management and edge protection may be required, so drilling is best completed by the fabricator or an experienced installer.
Check every penetration against the support below. A hole that misses its reinforcement can weaken the fixing and leave the installer tempted to enlarge it, which may compromise both the stone and the alignment.
Apply the correct sealant, adhesive or mounting hardware
Use only the sealant, adhesive, bedding compound or mechanical hardware specified for the stone and support materials. Some products can stain porous stone or fail to bond to a damp surface. Follow the stated preparation, curing time and joint dimensions rather than choosing a product solely by colour.
Apply enough material to achieve continuous support without creating a thick, uneven bed. Keep adhesive away from the waste opening and from any area that must remain removable for service.
Lower and secure the basin without damaging its edges
Plan the lift with enough people and space before the adhesive is exposed. Lower the basin vertically where possible, keep hands clear of pinch points and do not slide a heavy piece across a polished worktop. Align it to the reference marks, then secure it in the sequence shown by the fixing detail.
Allow the material to cure before connecting pipework or putting the basin into use. A small amount of patience here protects the joint and avoids transferring movement into the waste connection.
Test for leaks, stability and drainage
Testing should happen before the cabinet is closed and before final decorating. Inspect the basin from above and below, looking for rocking, gaps, stressed pipes or sealant pulled away from a joint. Record any adjustment rather than concealing it behind a panel.
Connect the waste and tap fittings carefully
Install washers, seals and nuts in the correct order, keeping fittings square to the basin. Tighten enough to create a seal but not so much that a brittle stone edge or plastic fitting is damaged. Support the waste while tightening so the pipework does not twist.
Connect the trap without forcing its alignment. If the pipe needs to be pulled into position, stop and correct the route; constant strain can lead to a slow leak that is difficult to see inside a cabinet.
Check that the basin remains level under load
Use a level on the rim or a suitable reference surface, then apply a modest, even load and check again. The basin should not rock, shift or open the joint when the support is loaded. Inspect the brackets, rails and cabinet connections if the level changes.
A level basin is also part of good drainage. A deliberately shaped bowl may not read as level at every point, so compare it with the approved geometry rather than trying to correct a designed slope.
Run water through the system and inspect every joint
Run cold water first, then fill the bowl partway and release it while watching the waste, trap, supply hoses and tap base. Use a dry tissue around joints because a small leak can be easier to see on paper than on a dark cabinet base. Repeat the test after the fittings have settled.
Do not close the access panel until the area remains dry. If a joint leaks, isolate the supply, empty the trap and remake the connection according to the fitting instructions rather than simply adding sealant around it.
Confirm drainage speed and check for standing water
Observe whether water flows freely across the bowl and into the waste without pooling at the rim or rear corner. Standing water may indicate an unsuitable fall, a blocked trap, a misaligned waste or a basin that is not sitting as intended. Check the outlet and trap before altering the basin position.
Test the overflow if one is fitted, and make sure its discharge does not wet the cabinet interior. Only after the drainage test is satisfactory should the final seal and access panels be completed.
Finish the installation and protect future access
The last stage is about durability as much as appearance. Clean away excess sealant without scratching the stone, check that visible joints are even and photograph concealed services before they disappear. A careful handover gives the owner or facilities team useful information for future cleaning and repairs.
Seal the joint between the basin and its support
Apply the specified flexible sealant to the basin-to-support joint, keeping the bead continuous and neatly tooled. Mask adjacent surfaces if needed and remove the tape before the sealant skins over. The seal should shed water without becoming a substitute for structural support.
Allow the stated cure time before exposing the joint to regular washing. If the support materials meet at a movement joint, preserve the intended flexibility rather than bridging it with a rigid filler.
Protect exposed stone from staining and moisture
Follow the stone supplier’s guidance for sealing, cleaning and curing. Use a soft cloth and a suitable pH-neutral cleaner unless the care instructions say otherwise, and keep acidic or abrasive products away from vulnerable finishes. Travertine, marble and onyx can respond differently to water, oils and cleaning chemicals.
Natural variation should remain visible, but avoid allowing construction dust, metal filings or coloured sealants to sit on the surface. Protection during the remainder of the project is often easier than removing a stain later.
Fit access panels or removable cabinet sections
Install panels so they can be removed without damaging the stone or breaking the finished seal. Check that a person can reach the isolation valves, trap and compression joints with ordinary tools. Label hidden services where the installation is complex, and leave a clear route for inspection.
This is also where a structured dog car seat cover has little to do with bathroom work, but its underlying idea of a stable, wipe-clean, removable surface is a useful analogy for service panels: they should stay secure in use while remaining practical to clean and remove. Keep the actual bathroom detail proportionate and purpose-built.
Record the fittings and maintenance requirements
Hand over the basin drawing, fixing details, sealant and adhesive information, tap and waste models, cleaning guidance and any photographs of concealed pipework. Note the stone type and finish, the date of installation and the location of isolation valves. This record helps a future installer avoid drilling or cleaning by guesswork.
For a made-to-order piece, retain the approved production drawing and delivery documentation as well. If the project needs project assistance, provide the dimensions, stone preference, finish, site location and access conditions so the quotation can address the actual installation rather than a generic allowance.
Conclusion
A successful stone basin installation depends on treating the basin, structure, plumbing and future access as one coordinated project. Confirm the load path, prepare a level support, resolve every pipe and fixing before installation, then test the finished work while it is still accessible. That approach respects the character of natural stone while giving the bathroom a secure, serviceable result.
Frequently Asked Questions
How much support does a stone basin need?
It needs support designed for the combined weight of the basin, worktop, fittings, water and reasonable incidental loads. The correct arrangement depends on whether it is wall-mounted, countertop, pedestal-mounted or integrated into a larger structure.
Can a stone basin be fitted to a plasterboard wall?
It can be possible, but the plasterboard itself should not be treated as the structural support. The wall normally needs suitable studs, noggins, a designed frame or other reinforcement connected to the building structure.
Should the basin be sealed to the worktop?
A continuous flexible seal is commonly used where the basin meets its support, but the product and joint detail should suit the stone and adjacent material. Sealant should prevent water ingress, not compensate for poor structural support or an uneven surface.
How do I check whether the waste is compatible?
Match the waste to the basin outlet, overflow arrangement, tap configuration and trap space. Confirm dimensions, thread length, washer position and whether a slotted or unslotted waste is required before purchasing fittings.
Is a wall-mounted basin harder to install than a countertop basin?
It can be, because the wall must carry the load and resist movement at the fixing points. A countertop basin may be simpler structurally, but its worktop, cabinet and trap still need to be designed for the basin’s weight and geometry.
When should a structural engineer be involved?
Consult one when the wall construction is uncertain, the basin is unusually heavy or projecting, support is concealed, the installation affects a structural element, or the proposed fixing differs from the tested or specified detail.
How should a natural stone basin be cleaned?
Use the care instructions for the specific stone and finish, usually with a soft cloth and a suitable pH-neutral cleaner. Avoid acidic, abrasive or harsh products unless the supplier expressly confirms they are safe for that surface.