

Key Takeaways
Custom marble fabrication turns a selected natural slab into a piece made for a particular space, drawing and installation plan. The result depends as much on planning and inspection as on cutting and polishing.
- Select the slab with its final use, dimensions and visual direction in mind.
- Approve drawings that show seams, edges, cut-outs, supports and tolerances.
- Treat veining, fissures and mineral marks as part of natural stone assessment.
- Inspect the finished pieces before dispatch, not only after installation.
- Confirm care, delivery and installation arrangements for the individual project.
Understanding the custom marble fabrication process
Custom marble fabrication is the controlled transformation of a natural slab into a made-to-measure surface, furniture element or architectural detail. Unlike a standard product, each stage is tied to the approved dimensions, the character of the chosen stone and the conditions at the destination. The process is therefore both visual and practical. A beautiful result still needs accurate drawings, suitable support and a realistic installation plan.
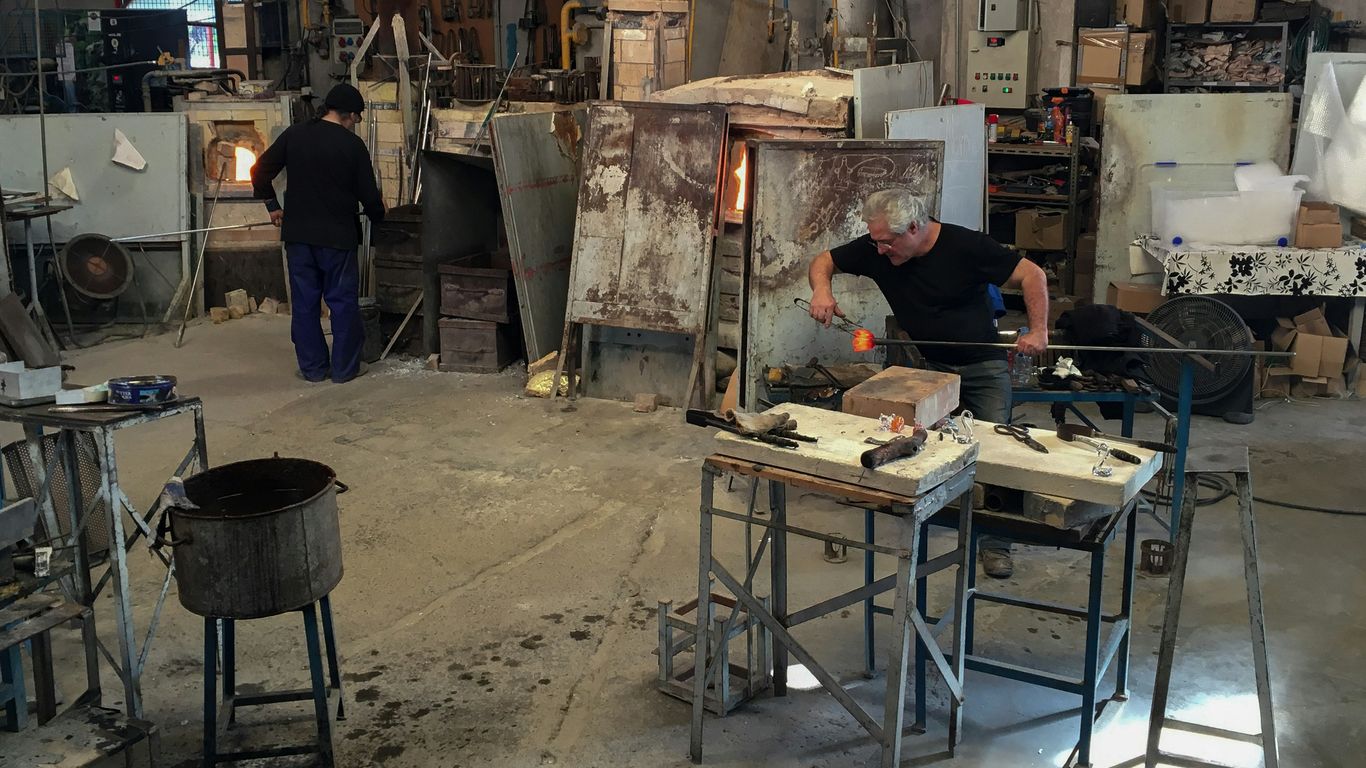
What makes fabricated marble different from standard products
A standard product is generally made to predetermined dimensions and finishes. Fabricated marble is developed around a particular brief, which may include unusual proportions, curved geometry, integrated openings or a carefully positioned vein. Natural stone also means that two slabs, even from the same material family, can differ in tone, movement and mineral detail.
The maker must account for the slab as it exists rather than treating it as a perfectly uniform sheet. That affects the cutting layout, the location of joins and the amount of usable material. The approved drawing is the reference point that keeps design intent and workshop decisions aligned.
When custom fabrication is the right choice
Custom work is useful when standard dimensions do not suit the room or when the stone itself is meant to be a focal point. It can be appropriate for made-to-order tables, vanity tops, counters, wall panels, fireplace surrounds and other pieces that need to fit a specific setting. It is also valuable when a designer wants control over edge treatment, finish and the relationship between several pieces.
For a broader view of made-to-order natural stone furniture, Geoscenic Stone describes pieces produced from approved specifications rather than treated as interchangeable warehouse stock. That distinction matters when the project depends on a particular size, stone choice or finish.
Key decisions to make before fabrication begins
Early decisions reduce changes later, especially once a slab has been cut. Confirm the intended use, final dimensions, visible faces, edge details, openings and the way the piece will be carried into position. It is also worth deciding how much natural variation the project should celebrate and which characteristics need discussion before approval.
A short written brief can cover the room, use, preferred appearance, practical risks and delivery location. A clear brief gives the fabricator something more useful than a reference photograph alone, while leaving room for the natural stone to retain its individual character.
How design, budget and installation requirements affect the process
Budget is shaped by more than the square measure of marble. Slab selection, material yield, thickness, detailed machining, finish, packing, transport, site access and installation requirements can all affect a quotation. Complex cut-outs or carefully controlled bookmatching may require more planning and create more material waste.
Projects also benefit from a realistic conversation about access. Narrow lifts, staircases, restricted loading areas and long carrying routes can influence piece sizes and packing methods. If you are comparing alternatives, a guide to custom stone fabrication offers a useful way to think about drawings, joins, edges and structural support before costs are fixed.
Selecting the right marble slab
Slab selection is where appearance and performance first meet. Colour photographs can help establish direction, but they cannot show every fissure, change in tone or variation in the full piece. Whenever possible, review the actual slab or a clear full-scale layout in relation to the intended design. This makes the later fabrication decisions more honest and precise.

Comparing marble types, colours and veining
Marble families vary in background colour, translucency, grain, porosity and vein character. Some are quiet and finely marked; others have strong movement that needs space to read well. The right choice depends on the room, lighting, use and the visual role of the piece rather than on a name alone.
Look at the slab from the distance at which it will be experienced. A dramatic pattern that works on a small sample may feel very different across a long counter or wall. For a furniture-specific approach, this marble slab selection guide is useful when considering colour, lighting, dimensions and the final cut.
Assessing slab quality, thickness and structural integrity
Inspection should cover the full slab, not only the most attractive corner. Check thickness, flatness, edge condition, visible repairs, open fissures and areas where the pattern or structure changes sharply. The intended span, overhang and cut-outs should be considered at the same time, because a slab that suits a wall panel may not suit a large unsupported top.
Thickness is a design and engineering decision. It affects the visible edge, weight, handling and support requirements, while a thicker appearance can sometimes be created through a built-up or mitred edge rather than a solid thicker slab. The choice should be shown clearly in the production drawing.
Identifying natural variation, fissures and surface imperfections
Natural marble may contain mineral marks, pits, small fissures, colour shifts and areas of different figuring. These features are not automatically defects, but they need to be assessed against the planned use and location. A mark in a low-visibility area may be acceptable; the same feature beside a sink cut-out or on a prominent front edge may need a different decision.
Ask how any filling, reinforcement or layout adjustment will affect the finished appearance. A transparent review at this stage is preferable to describing every natural characteristic as a fault or, conversely, assuming that every feature will disappear during polishing.
Matching slabs for continuity across large installations
Large installations may require more than one slab, making continuity a layout exercise as much as a sourcing exercise. Vein direction, background tone and the position of focal movement should be reviewed across a full-size arrangement. Bookmatching can create a mirrored effect, but it requires suitable slabs and careful agreement about the centre line, joins and openings.
Where a project uses several pieces, label the slabs and record the intended sequence. This gives the workshop and installation team a shared visual reference and helps prevent a cut-out from landing across an important vein without prior approval.
Confirming availability, batch consistency and lead times
Natural stone is not a uniform manufactured batch, so availability should be checked before the design is treated as final. Confirm the number of slabs, approximate dimensions, thickness, reserve material and the expected time for sourcing and preparation. Lead times also need to include drawing approval, fabrication, inspection, packing and delivery.
The quotation should make clear which assumptions apply to material, destination and installation. A little time spent confirming these details can prevent a finished design from depending on a slab that cannot be secured.
Developing the design and fabrication plan
The fabrication plan translates an idea into information that can be checked and made. It should bring together measured dimensions, material direction, edge profiles, openings, support points, finish and installation constraints. For bespoke work, the drawing is not merely an illustration; it is the record of what has been agreed.

Translating measurements and drawings into a fabrication template
Begin with verified site measurements and distinguish them from indicative design dimensions. The template should show walls, cabinetry, adjoining materials, fixed services and any irregularities that could affect the fit. A drawing review should identify which dimensions are critical and which can be adjusted within an agreed tolerance.
Templates may be digital, physical or a combination of both. Whatever the method, the final information must be legible to the people cutting, finishing, packing and installing the piece.
Planning seams, joints, overhangs and support points
Seams should be placed where they are least disruptive visually and where the underlying structure can support the joined pieces. Consider access, span, overhang and the position of appliances or basins before deciding on the joint. A narrow seam is not a substitute for a sound support strategy.
The drawing should identify support lines, brackets, substrates and any areas that cannot carry weight. This is especially relevant for large tops, cantilevered edges and pieces that will be moved through confined spaces.
Positioning veining, focal areas and pattern direction
A cutting layout should show which areas of the slab will be visible and how the pattern travels through the finished piece. Designers may choose a calm section for a working surface and reserve stronger movement for a front, splashback or central panel. The natural pattern should guide the layout without being represented as perfectly repeatable.
For more detail on orientation across worktops, walls and other applications, this guide to marble veining direction explains why the cut direction and seam plan need to be considered together.
Choosing edge profiles, cut-outs and surface finishes
Edges influence how thick, light or substantial a piece appears. A simple eased edge may suit a quiet interior, while a mitred detail can create a deeper visual profile without using a solid block of extra material. Cut-outs for basins, hobs, taps and outlets should be dimensioned and coordinated with the relevant fittings.
Finish should be selected alongside edge design, because a polished edge and a honed face catch light differently. Samples or small finished sections can help the client assess the relationship between the two before production begins.
Allowing for tolerances, movement and on-site conditions
No building is perfectly square, and natural stone is not infinitely forgiving. Allowances may be needed for walls, cabinetry, adjacent materials, adhesive beds, movement and the practical fit of large pieces. These allowances should be deliberate rather than left to be solved with improvised trimming on site.
A clear tolerance note also helps the installation team distinguish an intentional allowance from an error. The final plan should state what is fixed, what is adjustable and what must be checked before fabrication.
Cutting and shaping the marble
Cutting turns the approved layout into physical components. The workshop must balance accuracy with the fragile nature of natural stone, particularly around narrow sections, internal corners and openings. Good cutting is therefore a sequence of controlled decisions, not simply a fast pass through a machine.
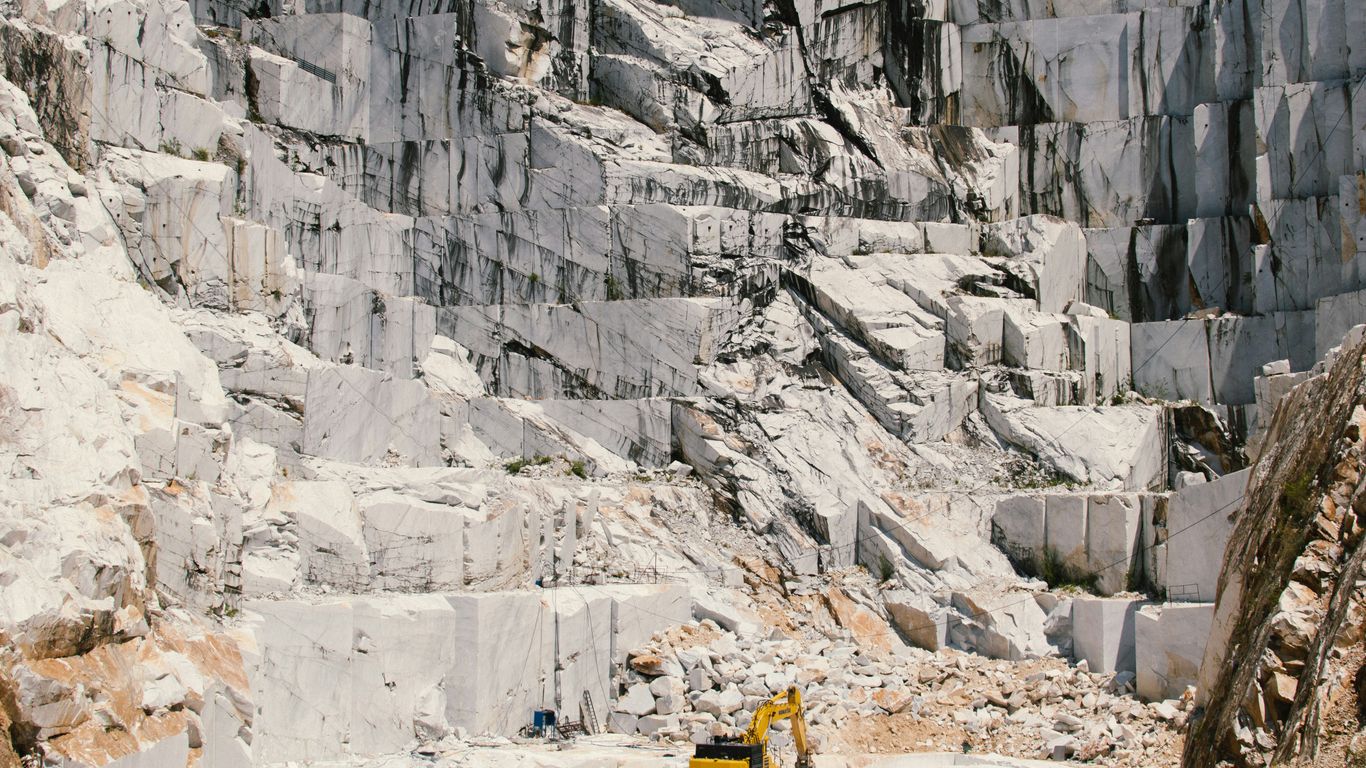
Using digital templating and precision cutting equipment
Digital templating can help transfer measured geometry into a repeatable cutting file, while saws, water-based cutting systems and other specialist equipment may be selected according to the material and detail. The toolpath still needs human review: a precise machine cannot correct an incorrect measurement or an unsuitable layout.
Before cutting, confirm the slab identity, orientation, file revision and visible face. This basic check protects against an avoidable error that could affect the entire piece.
Creating sink, hob, tap and outlet cut-outs
Openings need more than a line showing their overall size. The drawing should account for rim widths, clearances, corner radii, fitting templates, drainage and the relationship between the opening and the stone edge. Narrow bridges around cut-outs deserve particular attention because they can be vulnerable during machining and handling.
A cut-out should be checked against the actual or approved fitting information. Small changes to a tap position or appliance model can matter once the stone has been cut.
Forming curves, mitred edges and detailed profiles
Curves are developed gradually, usually from a rough cut through successive shaping and refinement stages. Mitred edges require accurate angles and a clean meeting line, while detailed profiles need enough material and support to survive machining. The more intricate the profile, the more useful a sample or corner mock-up becomes.
The visual effect should be considered from standing height and from nearby, since a profile can look restrained on a drawing but more prominent once it catches light across a room.
Managing fragile sections and preventing breakage
Support during cutting, lifting and transport is essential. Long narrow parts, corners around openings and pieces with large overhangs may need temporary reinforcement, altered sequencing or a revised joint. Handling plans should be agreed before the piece reaches the installation site.
Workshop safety and stone protection are linked. A component that is technically finished but poorly supported can still be damaged before it is installed, so lifting points and packing should be treated as part of fabrication rather than an afterthought.
Checking dimensions before polishing and assembly
A pre-finish inspection should confirm length, width, diagonals, opening positions, edge dimensions and the relationship between mating parts. It is easier to correct a cutting issue before polishing, sealing and final packing. For multi-piece furniture, dry-fitting also shows whether the planned joints and visual sequence work in three dimensions.
A short fabrication walkthrough can help clients understand why these checks take time. The practical lesson is simple: measurements should be verified at several stages, not assumed correct because the initial template looked sound.
Finishing and polishing fabricated marble
Finishing determines how the stone feels, reflects light and responds to daily use. It also reveals the quality of the shaping work, particularly along exposed edges and around openings. The finish should be agreed as part of the design rather than selected at the very end.
Selecting honed, polished, brushed or leathered finishes
A polished finish reflects more light and can deepen the appearance of colour and veining. Honed marble is softer and more matte, while brushed or leathered surfaces introduce texture and a different tactile quality. The choice depends on the room, the intended use, cleaning habits and the atmosphere the project needs.
This comparison of honed and polished marble can help frame the trade-offs between sheen, touch, maintenance and the way each finish presents natural movement.
Refining edges and exposed surfaces
Edges are refined through staged abrasives and careful handwork where necessary. They should be consistent in radius, sheen and transition, with particular care around corners and cut-outs. Exposed undersides or returns may also need finishing if they will be visible after installation.
Light inspection from different angles is useful because a surface can appear even under workshop lighting and show a variation when viewed beside a window or a wall light.
Filling, reinforcing and blending minor imperfections
Small pits or natural openings may be filled when appropriate to the stone and the use. Filling should not be presented as a way to erase the material’s character; colour, texture and reflectivity may still vary slightly. Reinforcement is a separate structural consideration and should be specified where the geometry or handling requires it.
Any significant repair, fill or change to the agreed appearance should be reviewed before final approval. That keeps expectations realistic and avoids treating a natural characteristic as a hidden problem.
Applying sealers suited to the marble and its intended use
Sealing can support stain resistance, but it does not make marble impervious to every substance or prevent etching. The correct product and application depend on the stone, finish and intended environment. The fabricator or installer should explain whether sealing is completed in the workshop, on site or as part of ongoing care.
The care guidance should name suitable cleaning methods and identify substances that may mark the surface. A clear maintenance routine is more useful than an absolute promise of effortless performance.
Balancing appearance, maintenance and slip resistance
A high sheen may suit a vertical panel but be less appropriate for a wet floor or a surface where glare is undesirable. Textured finishes can change grip and cleaning requirements, while honed surfaces may show marks differently from polished ones. These are design implications, not merely technical footnotes.
Choose the finish by considering the whole setting: light, moisture, contact, cleaning, touch and the desired visual depth. The best choice is the one that remains convincing after the first day of use.
Quality control before delivery and installation
Final quality control brings the approved drawing back into the conversation. The pieces should be checked as finished objects, not only as successful machining operations. Dimensions, visual continuity, edges, openings, packing and paperwork all contribute to whether the project arrives ready for installation.
Inspecting dimensions, finish consistency and edge details
Measure each component against the approved drawing, including thickness, opening positions, edge profiles and critical diagonals. Compare the finish across adjoining pieces under consistent light, while remembering that natural stone may show slight changes in tone or movement. Record any accepted variation so it is not confused with an unreviewed defect.
Edges deserve a close inspection because small chips, uneven polish or inconsistent returns are more noticeable once the piece is placed beside cabinetry or another stone surface.
Dry-fitting multi-piece worktops, panels or surrounds
Dry-fitting can reveal issues that a single-piece inspection cannot. Place the components in their intended order and check the seam, alignment, overhang, support and relationship between visible patterns. Where the final site conditions allow only limited adjustment, this rehearsal is particularly valuable.
The dry fit should be documented with photographs or marked drawings. It creates a shared record for approval before pieces are separated for packing.
Reviewing colour, veining and seam placement
Visual review should happen at a useful distance as well as close up. Confirm that the chosen focal areas, direction of movement and seam positions are consistent with the approved layout. The aim is not to demand a uniform pattern from a natural material, but to confirm that the variation has been handled intentionally.
For dining tables and other focal furniture, custom marble furniture provides a helpful reference point for connecting slab selection, drawings, finishes and final inspection.
Protecting finished pieces during handling and transport
Finished marble should be protected from impact, abrasion, moisture and unstable loading. Packing needs to suit the shape, weight, edges and route, with vulnerable corners and polished faces isolated from contact. Labels should identify orientation, component numbers and any lifting instructions.
Destination-specific delivery can introduce stairs, narrow doors, changing weather or long periods in transit. These conditions should be considered in the packing and handling plan rather than left to the final carrier.
Recording approvals and resolving defects before dispatch
Before dispatch, record the inspection date, drawing revision, accepted natural characteristics and any outstanding action. If a defect falls outside the agreed standard, resolve it before the piece leaves the workshop where possible. A written approval gives the project team a clear point of reference without pretending that natural stone can be made identical from one component to the next.
This documentation also makes installation more orderly. The team can see what was approved, what belongs where and which checks remain to be made on site.
Installing and inspecting the finished marble
Installation is the final part of fabrication, not a separate event with no connection to the workshop. The site must be ready to receive the pieces, and the installation team must understand their orientation, weight, support and handling limits. A careful final inspection then confirms both appearance and function.
Preparing the site, cabinetry and supporting surfaces
Cabinetry, substrates and support points should be complete, level and able to carry the expected load before delivery. Check wall conditions, access routes, moisture exposure and the position of services. The installer should also have the latest drawing, component labels and any agreed tolerance notes.
If site conditions have changed since templating, pause and assess them before forcing a piece into place. A small adjustment to the support or sequence may prevent a larger problem.
Handling, positioning and securing marble safely
Marble should be lifted with suitable equipment and enough people for its size and weight. Keep pieces supported in the orientation recommended for their geometry, and avoid placing pressure on thin edges or fragile sections. Once positioned, secure the piece using compatible materials and the specified support method.
The installation sequence should account for adjacent walls, appliances, basins and splashbacks. Rushing the first placement can make later alignment much harder.
Aligning seams, joints, cut-outs and adjoining materials
Check that seams close evenly, edges meet cleanly and openings align with the fittings they serve. Compare the installed direction of veining with the approved layout, while allowing for the way room lighting changes its appearance. Junctions with timber, metal, tile or painted surfaces should be reviewed for consistent gaps and clean transitions.
Sealants and adhesives should be selected for the material and location. Their colour and application can influence how visible a joint becomes, especially beside a light marble.
Carrying out the final visual and dimensional inspection
The final inspection should cover level, alignment, dimensions, overhangs, edge finish, cut-outs, joints and visible marks. Open doors, place fittings where appropriate and view the piece from normal standing and seated positions. If an issue is found, record its location and agree the remedy rather than relying on a verbal note.
A good handover distinguishes acceptable natural variation from damage, installation error or a departure from the drawing. That clarity protects the material and the relationship between the project team and fabricator.
Providing care instructions, warranties and maintenance guidance
Handover information should explain daily cleaning, suitable products, spill response, resealing expectations and the limits of the finish. It should also identify the approved stone and finish, the drawing revision, any relevant warranty terms and who to contact if a concern develops.
For project teams considering the wider commissioning process, specifying custom stone is a useful companion resource because it connects material properties with detailing, function and structural stability. Clear guidance lets the finished marble age with character while avoiding preventable damage.
Arrange Your Marble Project
If you are planning a made-to-order marble piece or architectural element, speak with Geoscenic Stone about your dimensions, stone selection, finish, edge details and installation requirements. You can request a quotation once the project information is ready for review.
Conclusion
Custom marble fabrication succeeds when the slab, drawing, workshop process and installation plan are treated as one continuous project. Careful selection preserves the character of natural stone, while accurate templates, controlled shaping, considered finishing and documented inspections give that character a dependable place in the finished space.
Frequently Asked Questions
What is custom marble fabrication?
Custom marble fabrication is the process of selecting, cutting, shaping, finishing and preparing natural marble for a particular design, set of dimensions and installation location.
How early should a marble slab be selected?
Select and review the slab before finalising the cutting layout, especially when colour, veining, thickness or the number of required slabs will influence the design.
Can natural fissures and mineral marks be removed?
Some minor characteristics may be filled or managed through layout, but natural stone features cannot always be removed and should be assessed against the intended use.
Why are approved production drawings necessary?
They record dimensions, openings, edges, finishes, seams, supports and tolerances so the client, fabricator and installer are working from the same information.
Which marble finish is easiest to maintain?
Maintenance depends on the stone, use and cleaning routine. Honed, polished, brushed and leathered finishes each present marks, texture and light differently, so suitability should be judged in context.
How is marble protected during delivery?
Finished pieces are normally labelled, supported and packed to protect faces, edges and corners from impact and movement during handling and transport.
What should be checked at final installation?
Inspect level, alignment, seams, cut-outs, edges, adjoining materials, visible surfaces and the condition of the marble, then record any issue and agree its resolution.