

Key Takeaways
A marble bathtub can be a remarkable centrepiece, but its installation depends on structure, access and careful coordination rather than appearance alone.
- Confirm the combined weight of the tub, water and occupants before ordering.
- Survey the complete delivery route, including doorways, stairs, lifts and temporary protection.
- Set the tub out around circulation, finished floor levels, plumbing and future access.
- Use a level, fully supported base and lift the stone without dragging or twisting it.
- Test every connection and establish a gentle maintenance routine for the marble.
Assess whether the bathroom can support a marble bathtub
A marble bathtub installation begins well before the tub reaches the bathroom. Natural stone is dense, and the finished load includes more than the empty bath itself. Check the structure, the route into the room and the bearing points together so that an attractive design does not create an avoidable structural problem.

Calculate the combined load of the tub, water and occupants
Start with the manufacturer’s or fabricator’s stated tub weight, then add the volume of water and a reasonable allowance for the people using it. Water weighs about 1 kg per litre, so even a moderate bath can add several hundred kilograms. Include fittings, supporting materials and any surrounding stonework if they bear on the same floor area.
A simple load schedule is more useful than relying on a general impression of the room. Record the empty tub weight, estimated water volume, maximum occupant load and the area over which the weight will be transferred. The resulting figure is a design input, not a guarantee that an existing floor is suitable.
| Item to assess | What to record | Why it matters |
|---|---|---|
| Empty tub | Fabricator’s confirmed weight | Establishes the permanent stone load |
| Bathing water | Internal capacity in litres | Adds substantial temporary weight |
| Occupants | Agreed design allowance | Covers the intended use rather than an empty room |
| Supports and fittings | Base, taps, panels and trim | Captures loads often missed in early estimates |
Use the schedule when speaking with the structural professional and when comparing alternative positions. The combined load matters because a compact footprint may concentrate weight more heavily than a larger, better-distributed support area.
Check joists, floor structure and load distribution
Identify the direction, spacing and span of the joists, together with the condition and thickness of the floor deck. A tub positioned across several supports may behave differently from one placed between joists, but that distinction must be checked rather than assumed. Look below the room where possible, especially if the bathroom is over another occupied space.
The bearing arrangement should be clear on the drawing. Point supports, narrow feet or an uneven substrate can create concentrated loads and local movement. A rigid, level base that distributes weight as intended is usually preferable to improvised packing.
Know when to consult a structural engineer
A structural engineer should review the proposal when the tub is on an upper floor, the building is older or altered, the floor shows movement, or the load cannot be confidently traced to suitable supports. The same applies when joists must be cut, strengthened or altered for waste pipework. Ask for advice before ordering or opening up the floor, not after the tub has arrived.
Give the engineer the tub’s confirmed dimensions, empty weight, filled capacity, support footprint and proposed location. A natural stone bathtub guide can also help a project team organise the early questions around material, measurements, structural requirements and delivery logistics, without replacing a site-specific assessment.
Account for upper-floor, suspended-floor and timber-frame risks
Upper floors and suspended floors need particular care because deflection, vibration and load paths can be less obvious than they are at ground level. Timber-frame construction may require coordination between the structural designer, builder and plumbing team, especially where services pass through engineered members. Do not assume that a tiled bathroom floor has the same capacity as a concrete slab.
Where access to the underside is limited, record what is known and what remains uncertain. A written decision about the support strategy is safer than proceeding from photographs or a vague comparison with another bathroom.
Plan access and delivery before ordering
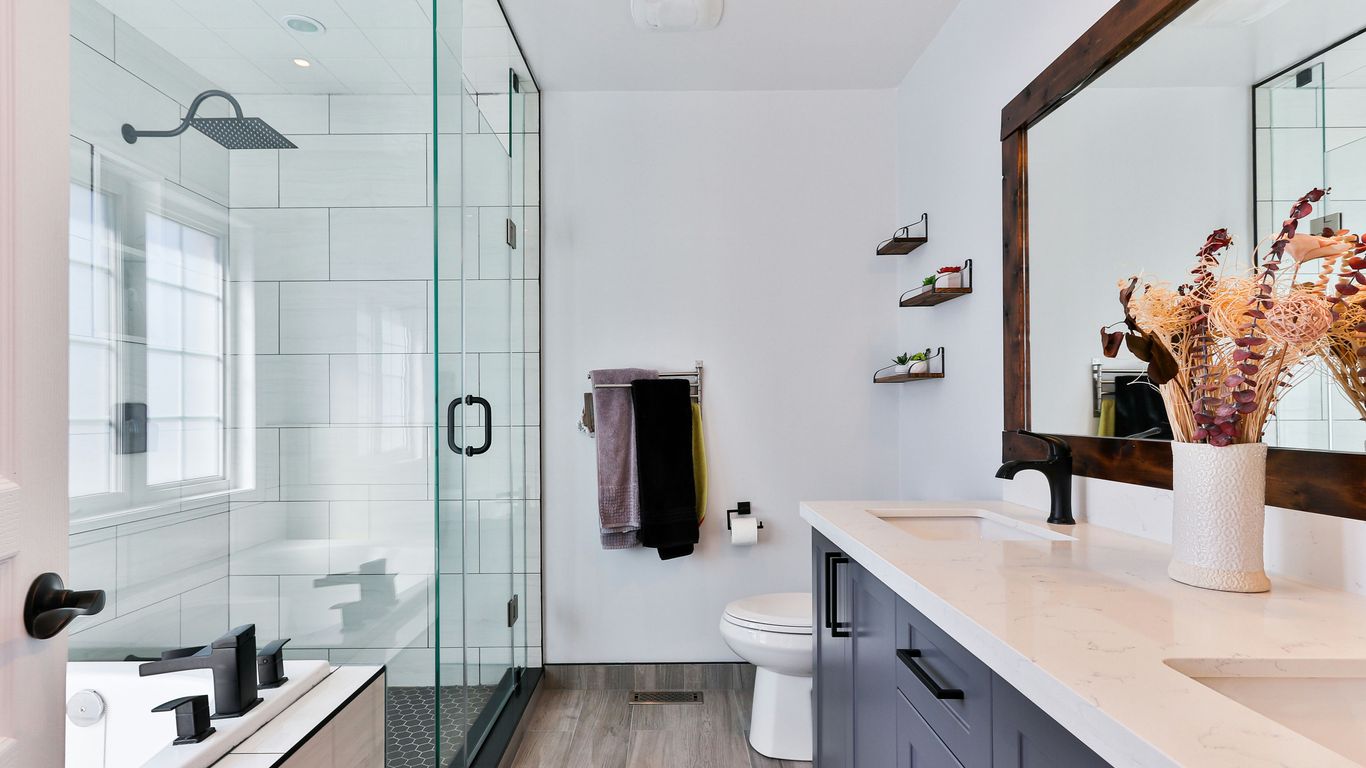
A stone tub can be structurally suitable and still impossible to deliver through the finished building. Measure the route as a connected sequence, allowing for corners, landings, door swings and the people or equipment required to move the piece. Confirm these details against the approved dimensions, not just a product photograph.
Measure doorways, corridors, stairs and lift dimensions
Measure the clear opening rather than the nominal door size. Record corridor widths, ceiling heights, stair turns, landing dimensions and lift doors, including handrails or other fixed obstructions. Note whether doors can be removed and whether the route remains usable once protective boards and lifting straps are added.
A site sketch with photographs and dimensions gives the fabricator and delivery team something practical to review. Include the final bathroom entrance, because a route that works to the hallway may fail at the last turn.
Compare the tub’s weight and dimensions with the available route
Compare the longest, widest and deepest parts of the tub with each pinch point. Also consider its centre of gravity and how it will be held; a dimensionally compatible doorway may still be unsafe if the tub cannot be rotated or supported there. Confirm the packed dimensions as well as the finished dimensions, since crating and edge protection require additional space.
Before committing, review the delivery plan against the material and finish. A factory-to-order maker such as Geoscenic Stone can confirm project-specific dimensions and delivery requirements as part of the quotation process; the route itself still needs to be surveyed by the project team.
Plan lifting equipment, labour and temporary protection
Decide who is responsible for the lift, how many trained people are required and whether a hoist, lifting frame or other equipment is needed. Protect corners, flooring, walls and thresholds with materials that will not shed grit against the stone. Keep the route dry, clear and well lit on the day.
A short delivery sequence helps everyone arrive prepared:
- Confirm the delivery window and site contact.
- Photograph and check the route immediately before unloading.
- Install temporary floor and wall protection before the tub enters.
- Agree the lifting points and final resting position.
The list is deliberately practical: a small omission at the entrance can force a last-minute change in handling. Do not use the tub as a work platform or leave it standing on unsuitable packing while other trades work around it.
Decide whether glazing, doors or walls need temporary removal
Consider temporary removal of a door leaf, shower screen, glazing panel or other obstruction before the delivery date. In some buildings, a window or external opening may be the safest route, but that introduces weather protection, lifting and reinstatement requirements. Obtain permission for any removal and arrange qualified trades where necessary.
Document the reinstatement plan, including seals, trims and making good. Delivery is complete only when the tub is safely inside and the building can be closed and protected again.
Choose the placement and prepare the room
Placement affects both the visual balance of the bathroom and the practical work of using, cleaning and servicing the tub. Set out the full footprint with a template before finalising walls, finishes or fittings. This is also the point to coordinate the stone’s natural variation with the wider room rather than treating the bath as an isolated object.

Position the tub around clearances and bathroom circulation
Allow comfortable space at the entry side, around tap controls and beside any wall or screen. Check door swings, drawers, WC clearance and the route used to clean the floor. A freestanding form needs enough visual and physical breathing room; placing it too close to a wall can make both maintenance and delivery connections awkward.
A designer’s freestanding marble bathtub guide is useful when considering size, stone, finish, support and positioning together. Use the chosen dimensions to mark the tub on site at full scale rather than estimating from a plan.
Confirm finished floor levels and the tub’s support points
The tub should be set against the finished floor level, not the unfinished deck. Account for tiles, stone, adhesives, underlay and any transition between adjacent finishes. Mark every intended support point and check that it lands on a stable, prepared surface.
If the floor build-up changes after the tub is made, the waste connection and final rim height may change too. Freeze these dimensions in the production drawing and review them before fabrication.
Protect walls, floors and stone surfaces during installation
Clear dust-producing work from the room before the tub arrives where possible. Use clean, non-abrasive protection on finished floors and keep tools, fixings and cement products away from exposed marble. Edge guards should be secure but easy to remove without levering against the stone.
Natural marble varies in tone, veining, porosity and mineral markings. That variation is part of the material, so inspect the delivered piece in good light and record any agreed observations before installation rather than trying to disguise them later.
Coordinate the tub position with windows, radiators and fittings
Check how the bath relates to windows, radiators, towel rails, sockets and lighting. Curtains, blinds and heated surfaces should not obstruct access or create a cleaning trap. Keep taps within comfortable reach and make sure the overflow and waste remain serviceable once the tub is in position.
For adjacent stone elements, dimension the relationship carefully. Guidance on custom marble basins illustrates why tap clearances, drainage and the relationship between made-to-measure pieces need to be settled before production.
Prepare the plumbing and waste connections
Plumbing should be designed around the selected tub and tap configuration, not improvised after the stone is positioned. Confirm pipe routes, connection heights and access panels with the plumber and fabricator. A clear drawing can prevent an elegant bath from concealing an inaccessible joint or an awkward waste run.
Set out hot and cold water supplies for the chosen tap configuration
Decide whether the taps are wall-mounted, deck-mounted or floor-mounted, then set out the supplies to suit the exact drilling and reach. Confirm the finished height of the rim, the spout projection and the location of handles or a hand shower. Protect open pipework from debris during the remaining works.
Do not drill the stone on site unless the method, tooling and responsibility have been agreed in advance. Tap holes, overflow details and other penetrations should correspond with the approved drawing.
Plan the waste route, trap access and connection height
The waste route needs enough room for the trap, joints and a future means of inspection or replacement. Confirm the outlet position, connection height and access panel before the base is closed. Where the trap is hidden beneath the tub, plan how it can be reached without removing a heavy stone piece.
The same principle applies to nearby basins and vanity plumbing. A stone basin installation guide is a useful reference for checking weight, fixing, waste, trap details and future access as part of one coordinated installation.
Check falls, pipe sizes and access for future maintenance
Confirm that the waste pipe can achieve its required fall without conflicting with joists or other services. Use the pipe sizes and connection details specified for the installation, and leave enough room to tighten, inspect and replace seals. Avoid burying a connection simply because it is out of sight.
Run a dry check before final fixing. Water should have a clear path away from the tub, and the route should remain accessible for maintenance rather than only for the initial test.
Coordinate floor penetrations with joists and existing services
Mark every penetration on the structural and plumbing drawings. Check for electrical cables, heating pipes, joists and waterproofing layers before drilling or cutting. If the proposed route conflicts with structure, return to the design team rather than moving a support or weakening a member on site.
The final location of the waste may also affect the tub’s rotation during installation. Resolve that sequence before the bath is lifted into the room.
Prepare the base and install the marble tub
The base carries the consequences of every earlier decision. It must be level, rigid and compatible with the tub’s support geometry, while still allowing the plumber to complete and inspect the connections. Keep the installation sequence written down so that the stone, plumbing and finishing trades do not work against one another.
Create a level, rigid and fully supported bearing surface
Prepare the substrate to the specified level and verify it with a long straightedge and suitable measuring tools. Remove loose material, correct hollows and make sure the bearing surface will not settle under the combined load. The support should contact the intended areas evenly rather than relying on a few high points.
Before the lift, place the dry-fit base and check the waste alignment, finished rim height and clearances. This is the least risky moment to correct a discrepancy.
Use suitable pads, supports or mortar beds without stressing the stone
Use only support materials and methods approved for the tub and substrate. Pads, cradles or a mortar bed must support the design load without creating hard points that could stress or chip the marble. Do not force the tub down onto an uneven surface or use random shims to make up a large difference.
For a made-to-order piece, Geoscenic Stone works from confirmed requirements such as dimensions, finish and installation details; the installer should still follow the agreed support specification and report any mismatch before fixing.
Lift and position the tub without dragging or twisting it
Use the planned lifting equipment and protect the stone at every contact point. Keep the tub supported in the orientation intended for the lift, lower it slowly and avoid dragging it across the floor. Twisting during the final movement can damage both the stone and the prepared base.
Once lowered, check the position from all sides before releasing the lifting gear. Do not use taps, waste fittings or thin edges as handles.
Connect the waste and taps while maintaining service access
Complete the waste and tap connections according to the approved set-out, keeping seals clean and joints accessible. Support pipework independently so that it does not pull on the tub or fittings. If an access panel is required, make sure it can actually be removed once skirtings, panels and furniture are complete.
Avoid closing the surrounding work until the connections have been inspected and tested. A neat finish is useful only if the installation beneath it remains maintainable.
Waterproof, seal and finish the installation
Water management around a marble bathtub is about directing water away as well as sealing visible joints. Use a compatible waterproofing system for the room and follow its preparation and curing requirements. Marble also needs protection from unsuitable chemicals and abrasive building residue throughout the finishing stage.
Waterproof surrounding walls and floor areas where required
Apply the specified waterproofing to wet areas, junctions and floor zones in accordance with the project design and local requirements. Pay particular attention to wall-to-floor transitions and penetrations around pipes. The waterproof layer should be continuous behind the finished surfaces, not treated as a substitute for a neat silicone joint.
Keep the bath protected while tiling, grouting and decorating continue. Do not allow standing water to test an uncured system.
Seal the waste, tap penetrations and junctions with compatible products
Select sealants and gaskets that are compatible with the marble, plumbing materials and waterproofing system. Clean and dry the surfaces before application, and tool joints so that water sheds away rather than pooling at the edge. Follow the product’s curing time before filling the bath.
A seal is not a cure for movement or poor alignment. If a joint is excessively wide, irregular or under tension, correct the underlying detail instead of adding more sealant.
Allow for movement without trapping water against the marble
Buildings and finishes can move slightly with temperature, moisture and loading. Detail junctions so that movement can be accommodated without locking the stone against rigid elements. Keep horizontal ledges and concealed edges arranged so water cannot remain against the marble.
Movement joints should be clean, continuous and easy to inspect. A small, deliberate gap is generally preferable to a compressed joint that fails unpredictably.
Protect the surface from grout, cement, acidic cleaners and impact
Cover the tub with clean protective material during finishing, but do not use coverings that trap moisture or grit against the surface. Remove cement splashes promptly using only approved methods. Acidic cleaners can etch marble, while dropped tools can chip edges even after the main installation is complete.
Before handover, remove protection carefully and inspect the surface under natural and artificial light. Care advice should be given to the owner with the completion documents.
Test the completed installation and plan ongoing care
Testing should happen before the bathroom is declared finished and again after the first complete filling and draining cycle. Check the stone, fittings, surrounding finishes and access panels as one system. Keep records of the products used for sealing and cleaning so future maintenance does not rely on guesswork.
Check the tub is stable, level and evenly supported
Confirm that the tub does not rock, shift or bear heavily on one isolated point. Recheck level at the rim and inspect the support line where visible. Do not compensate for movement by forcing a rigid fitting or by packing material into a joint after the fact.
If the tub has moved since dry fitting, stop and identify why. A heavy stone bath should not be accepted on the assumption that its weight will eventually settle it into place.
Test the water supply, waste flow and overflow for leaks
Run each tap, inspect the supply connections and fill the tub to a useful test level. Check the waste, trap, overflow and every accessible joint while the bath is full, then watch the discharge as it drains. Dry the area and repeat the inspection after a short interval, since a slow leak may not appear immediately.
Record the test and rectify any moisture before sealing access panels or completing adjacent joinery. If the plumbing route is hidden, use the planned access rather than relying on visual checks from a distance.
Inspect surrounding finishes after the first filling and draining cycle
Look for staining, dampness, movement at sealant joints and water collecting against the floor or wall. Check that doors, drawers and screens still clear the tub when the room is being used normally. The first cycle can reveal small coordination issues that were invisible during a dry installation.
A bathroom stone care guide can help owners understand sealing, finish differences and everyday cleaning without treating natural marble as a maintenance-free surface.
Establish suitable cleaning, sealing and maintenance routines
Use a soft cloth or non-abrasive method and a cleaner confirmed as suitable for marble. Avoid acidic products, harsh scouring powders and leaving oils or coloured liquids on the surface. Follow the stone supplier’s advice on whether and when resealing is appropriate; porosity and finish vary between materials.
Keep the care instructions, drawings and installation records together. For a project involving a made-to-order bath, request a quotation early enough to discuss dimensions, stone selection, packing, destination and site access before the final design is fixed.
Commission the stone with confidence
If your project needs a made-to-order marble bathtub or related architectural piece, speak with Geoscenic Stone about the approved drawing, material selection, finish, dimensions and delivery conditions. Early coordination gives the factory and site team time to address weight, packing and access before production begins.
Conclusion
A successful marble bathtub installation is the result of joined-up planning: verify the structure, prove the delivery route, coordinate plumbing and set the stone on a properly prepared base. Once installed, careful sealing, testing and gentle cleaning will help preserve the character of the marble while keeping the bathroom practical.
Frequently Asked Questions
How much does a marble bathtub weigh when full?
The total depends on the empty tub, its internal capacity, the occupants, fittings and support materials. Add the water at roughly 1 kg per litre and have the resulting load checked for the actual floor and support arrangement.
Can a marble bathtub be installed on an upper floor?
It may be possible, but the structure and load path must be assessed for the specific building. Upper floors, suspended floors and timber structures should be reviewed before ordering or altering joists.
How do I know whether the tub will fit through the house?
Measure clear door openings, corridors, stairs, landings, lifts and the final bathroom entrance. Compare these dimensions with the tub’s finished and packed size, allowing room for lifting equipment, protection and rotation.
Should the plumbing be installed before the tub arrives?
The set-out should be prepared beforehand, but final connections are usually made as part of the installation sequence. Leave the waste, trap and tap connections accessible for inspection and maintenance.
Does a marble bathtub need a special base?
It needs a level, rigid and fully supported bearing surface that matches its support points. The exact pads, cradle or mortar-bed method should suit the tub, substrate and approved installation detail.
What should I avoid when cleaning marble?
Avoid acidic cleaners, abrasive powders, cement residue and impact from tools or hard objects. Use a gentle, marble-compatible cleaning method and follow the supplier’s advice on sealing.
When should the completed installation be tested?
Test the supplies, waste and overflow before closing access panels or surrounding joinery. Repeat the inspection after the first full filling and draining cycle to catch slow leaks or movement at the finishes.